The procedures outlined below are more complex than simply creating a text document, and unintended keystrokes are more likely. Turning the AutoSave switch in the upper left corner of the Word screen to Off may be a good choice coupled with frequent manual saves of your cover as each successful addition to your project is completed. Also the keystrokes Ctrl+Z may be used to undo mistakes. It would also be useful to refer to the KDP help document on creating a cover before you begin your project. Click here for that information. Amazon Paperback Cover help
The following instructions show how to create the cover art for a 6 X 9 inch paperback book.
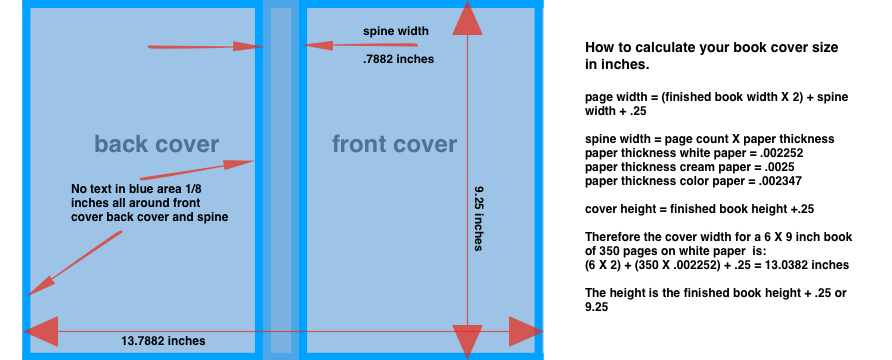
Let's begin with the cover art size which is based on the finished book size and the number of pages in the book including front and back matter.
The following picture shows how the cover size is determined. That will be the page size of the Word document that becomes the book's cover
Begin by opening a new Word document and immediately select 'Layout' in the row of Tabs on the second row down at the top of the screen. See the red number 1 arrow on the Word Screen Below. If you are unfamiliar with the layout of the Word screen click here for a complete explanation. Word Screen
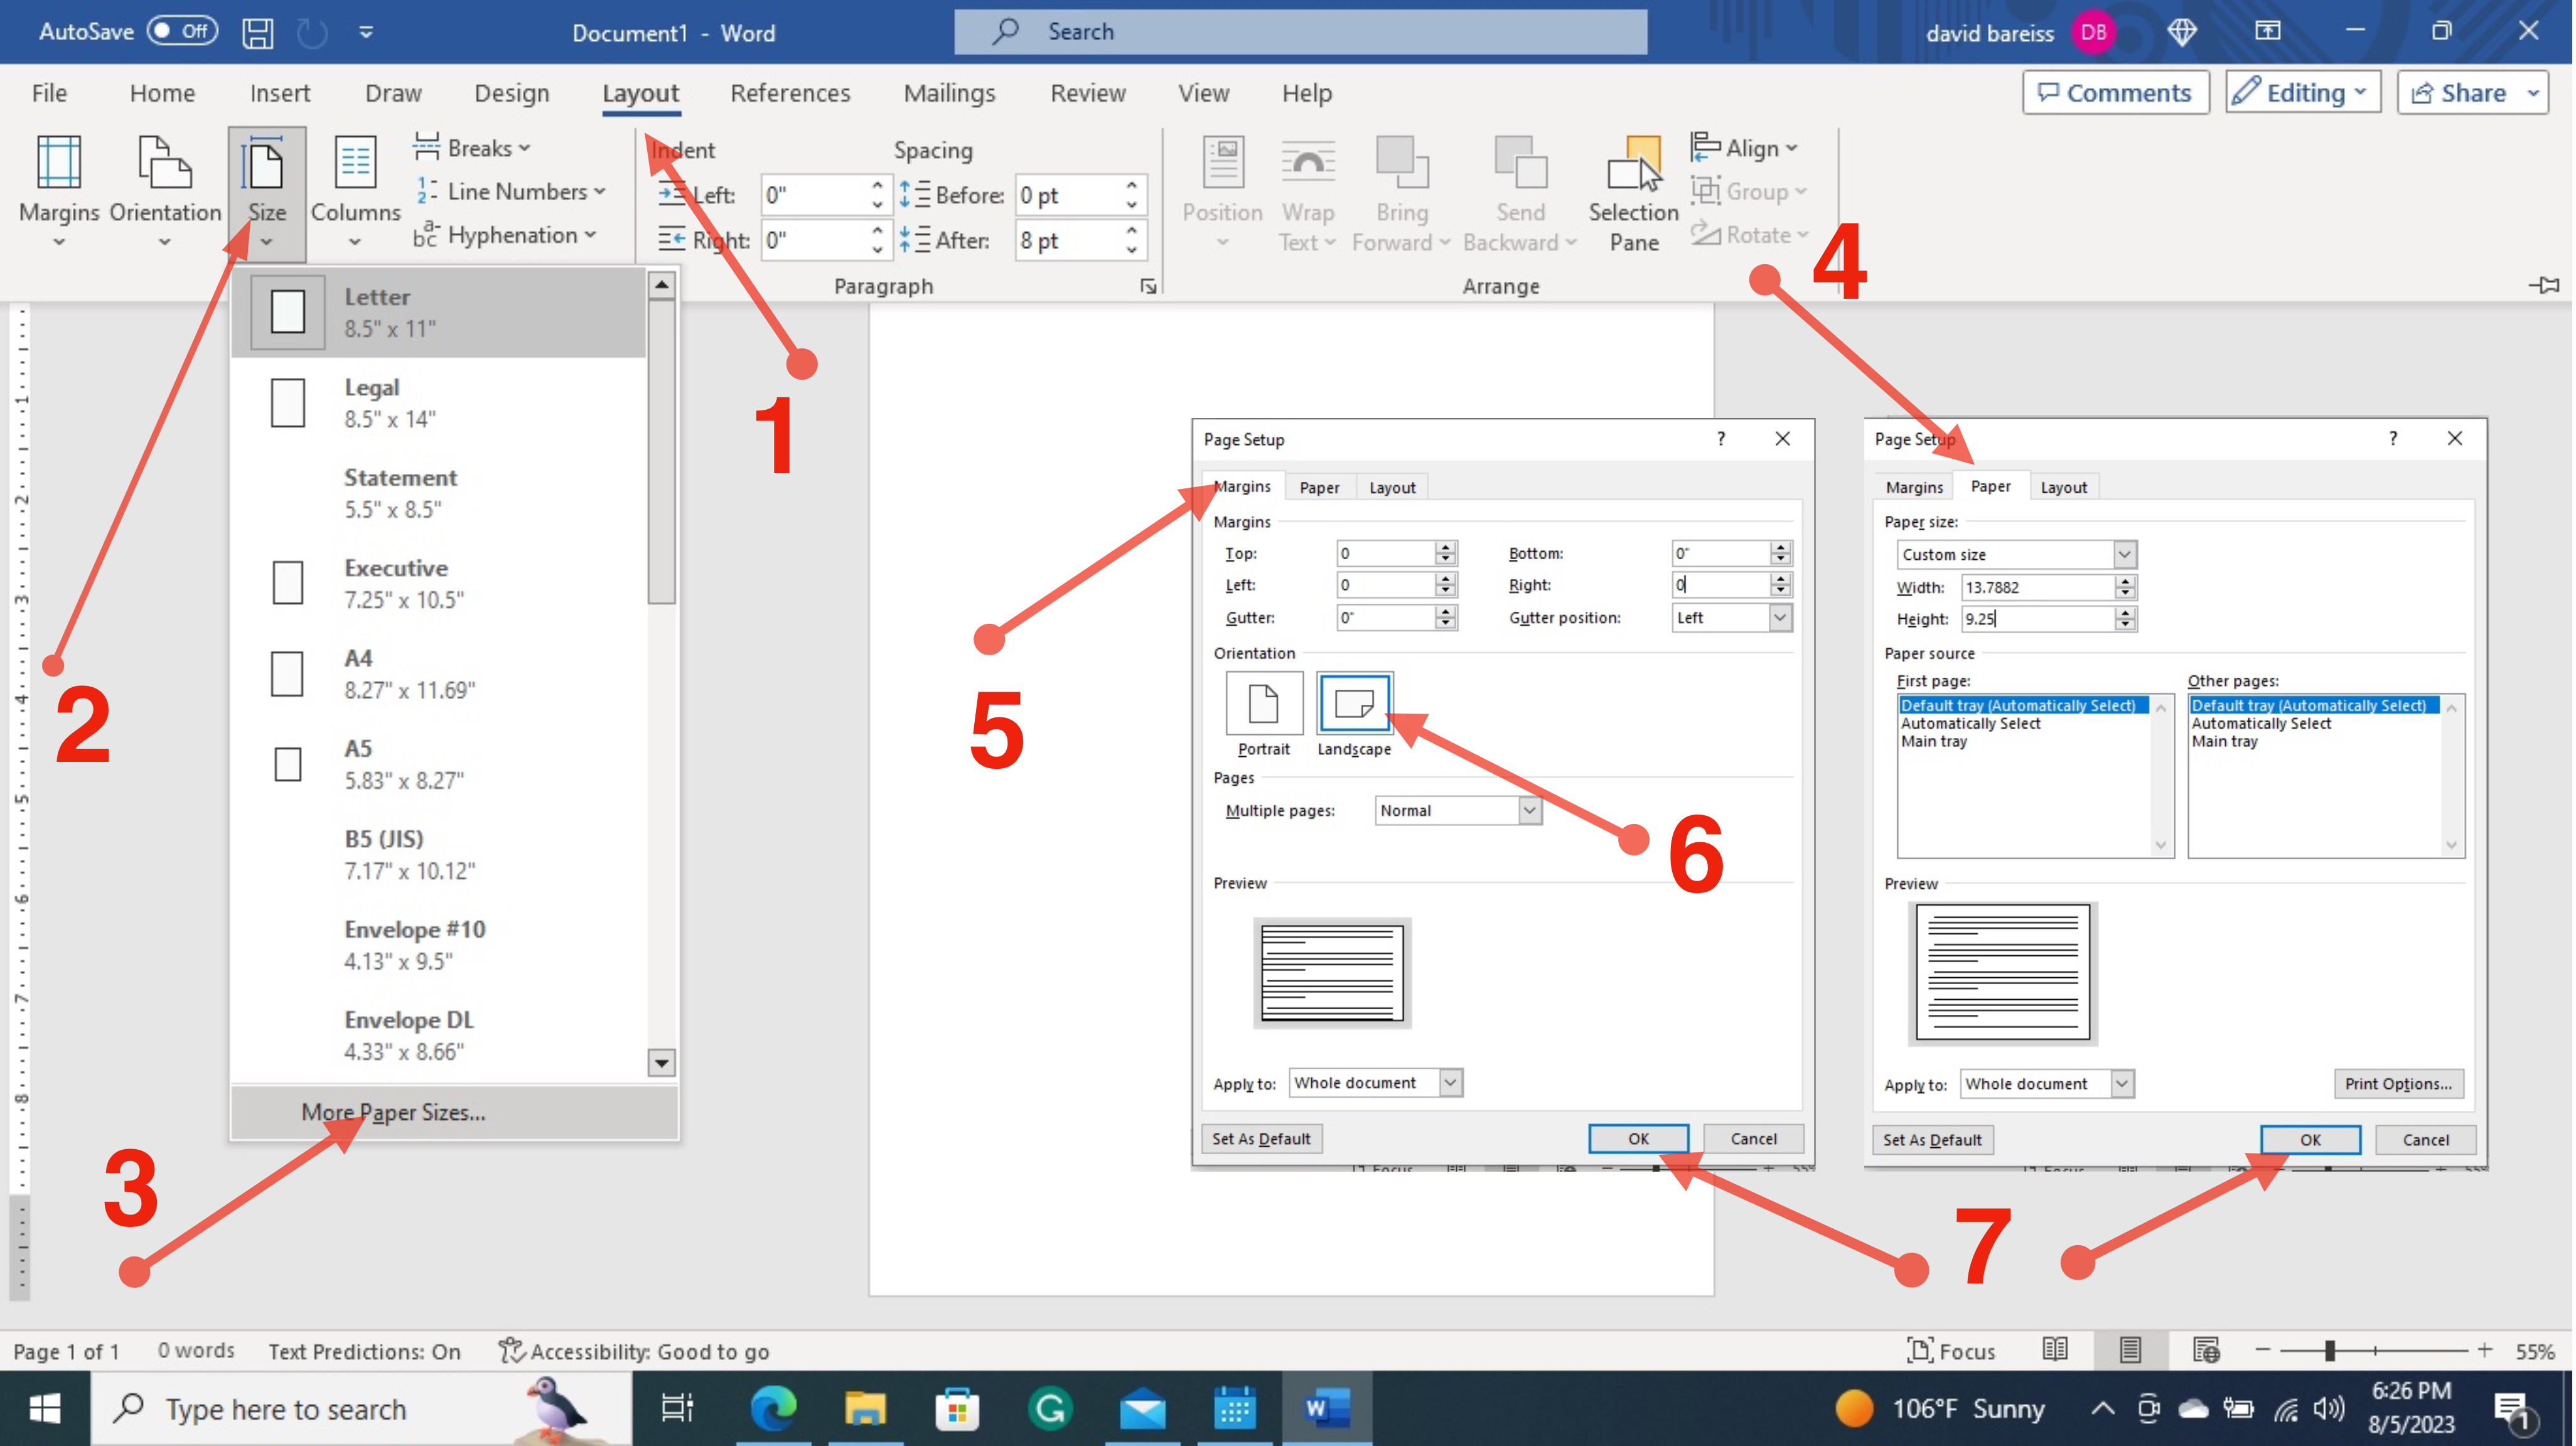
Number 2 select Size. 3 select More Paper Sizes. 4 Under 'Paper' enter the Width and Height calculated above: 13.7882 and 9.25. 5 Under 'Margins' emter 0 in all boxes. 6 Click Layout under Orientation. 7 Click OK in both boxes to finish.
The following warning message should appear if you entered 0 for all margins. Click on 'Ignore'

Your Word screen should now display a blank paper with rullers showing a paper size of 13.7882 inches wide by 9.25 inches high. If the rulers are not displayed click on the View Tab and place a check mark in the Ruler box. The rulers will come in handy later for positioning pictures, text boxes, etc. Note the margin markers in the horizontal ruller are positioned at 0 and 13.7882, the full width of the canvass. If not, go back to the layout and set all margins to 0
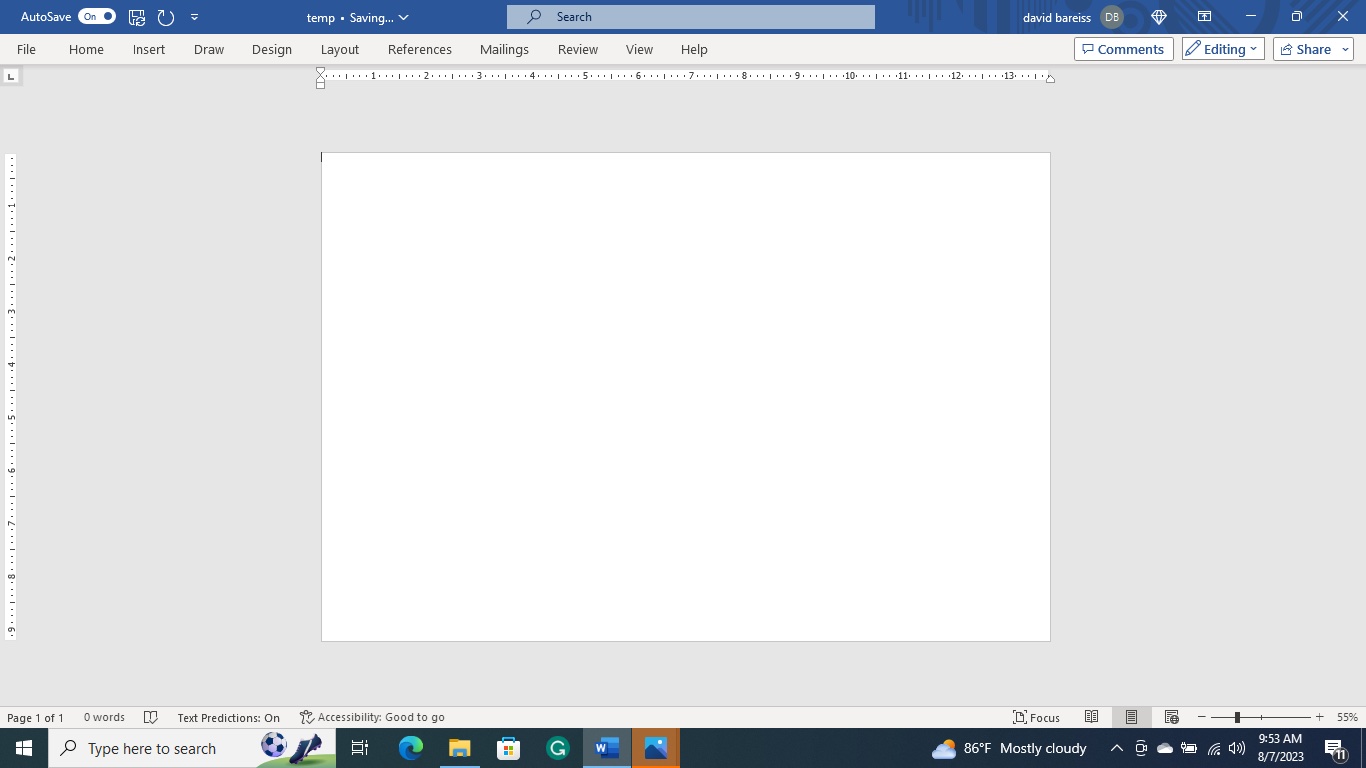
You now have a basic canvas of the proper size to fit your book. The remaining instructions below cover a small portion of what is available in Word for designing cover art and could not possibly be completely covered here.
You can now start adding pictures and text on the paper, by selecting the 'Insert' tab and selecting type of items to be inserted. If you are going to use pictures, start by adding one picture. In the example below you will notice there are tiny squares at the corners and side centers. These are selection handles used adjust the item. You may click and drag the sides or corners to adjust the size and position of your picture. If the handles are not visible, move the cursor over the picture and click.
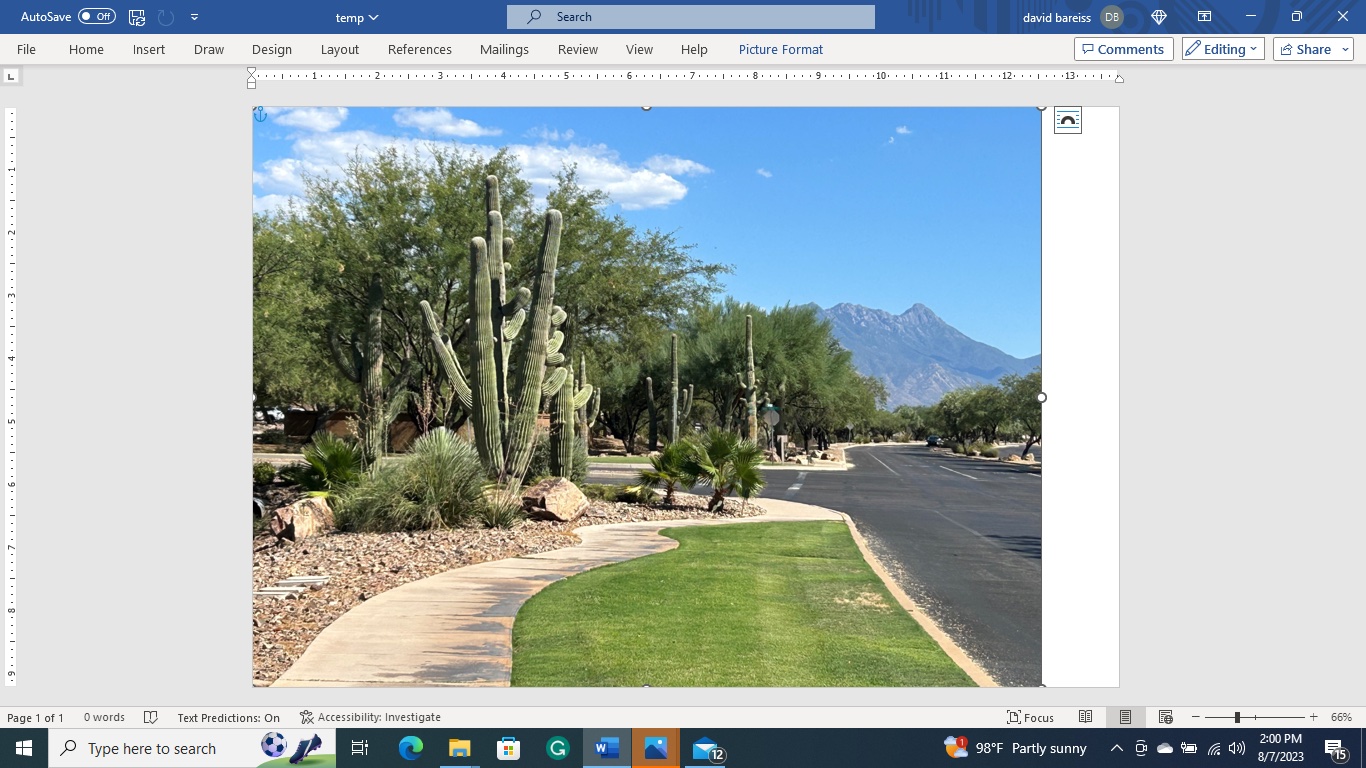
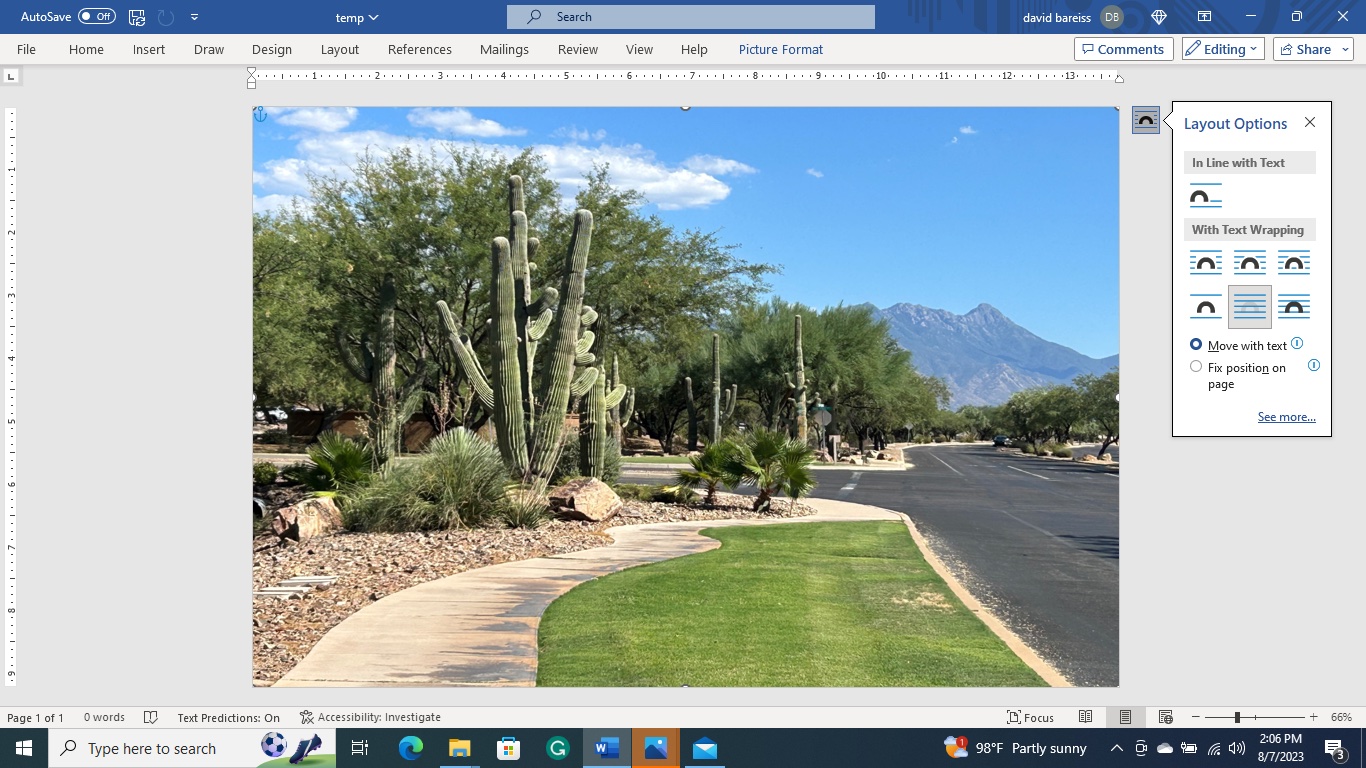
In the example below the right edge of the picture was moved to the right edge of the page using the right side selection handle. The layout option icon was selected showing the available options for displaying text associate with this picture. The highlighted option allows text to be overlayed on the picture.
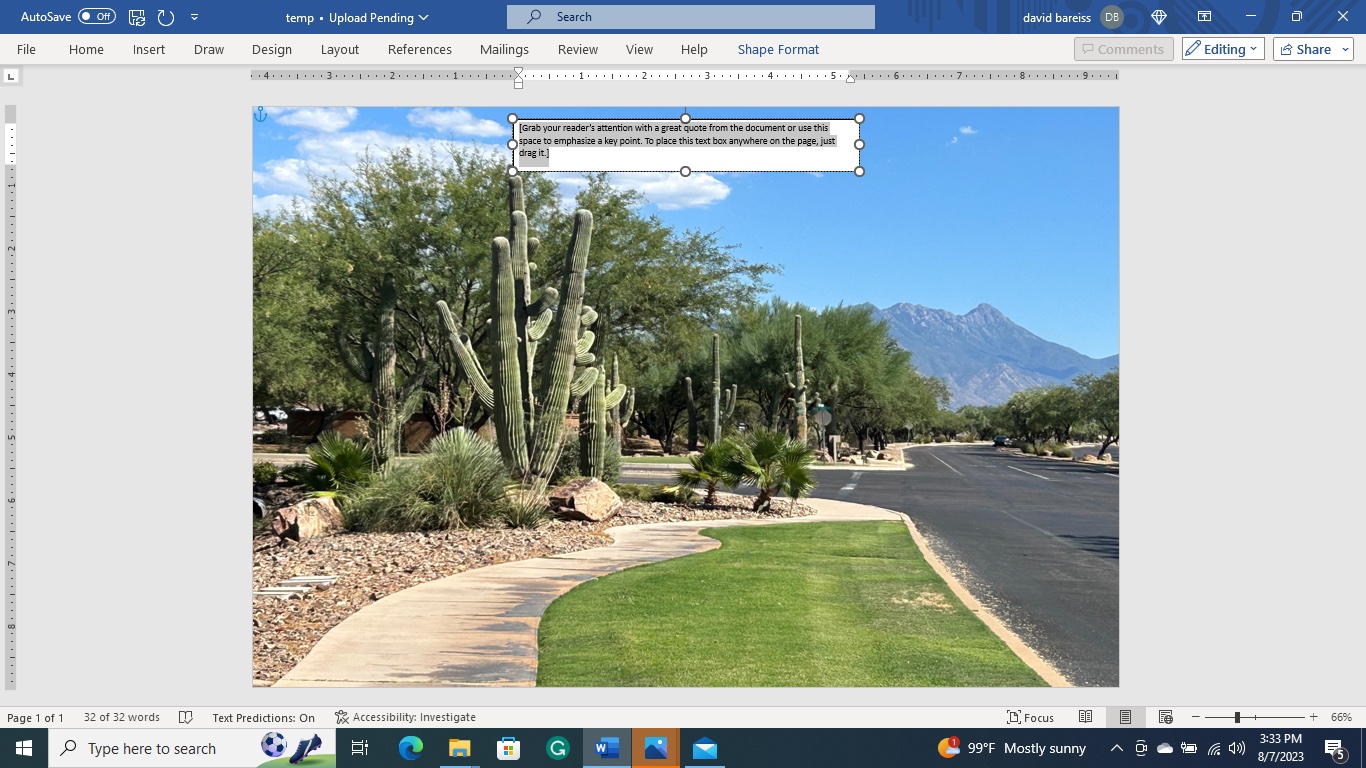
In the example below a text box was selected on the 'insert tab' and it appeared in the center of the canvas with instructions already in it explaining how to position the text box. Notice that the highlighted area in the ruler above and on the right show the exact location of the box. The measurements are the width and height of the box and the distance of the left of the box to the left edge of the canvas and the distance of the top of the box to the top of the canvas. This feature will be helpful in positioning the edited text to its final spot on the canvas
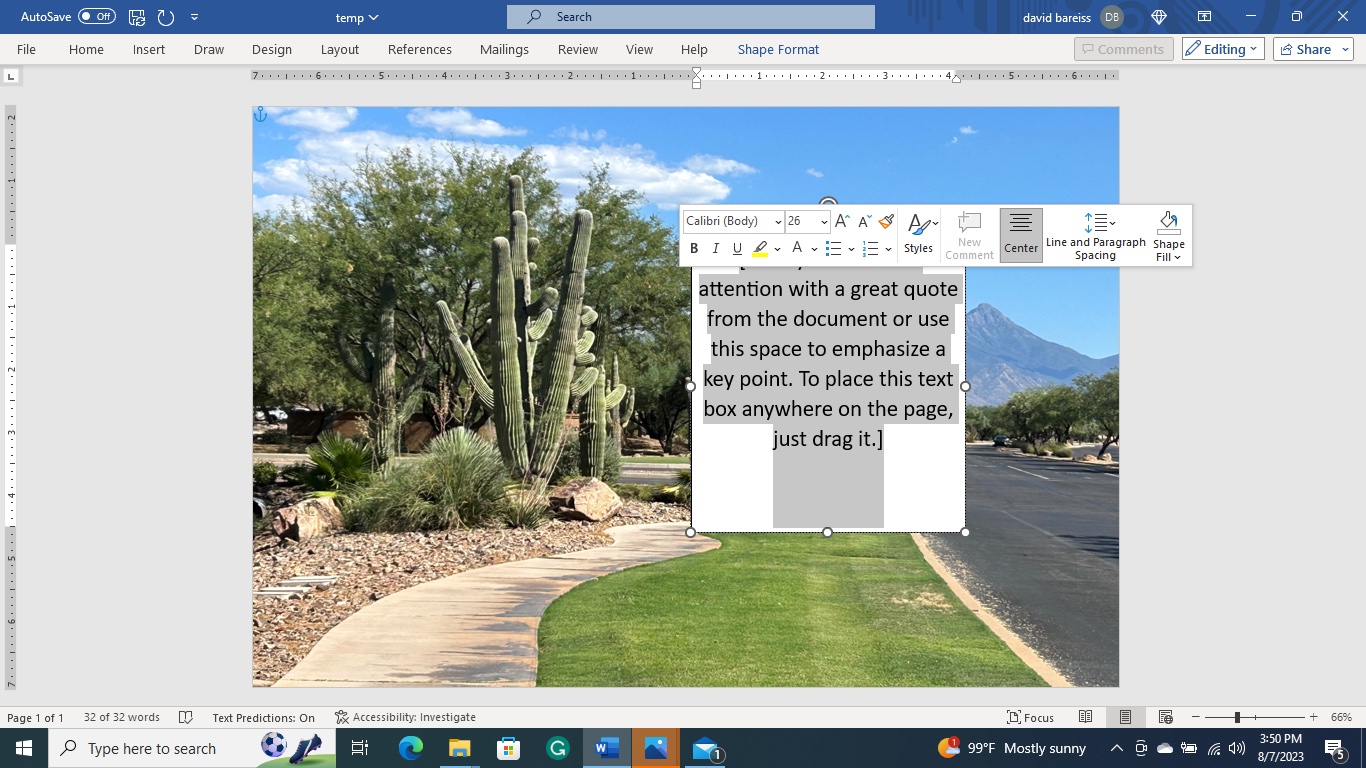
In the example below the text box has been moved to a new location, the text was highlighted by draging the cursor over it. This caused a sub window to open above the text box with options for text size, color, font, etc. Notice the highlighted area of the rulers reflect the movement of the box to its present location.
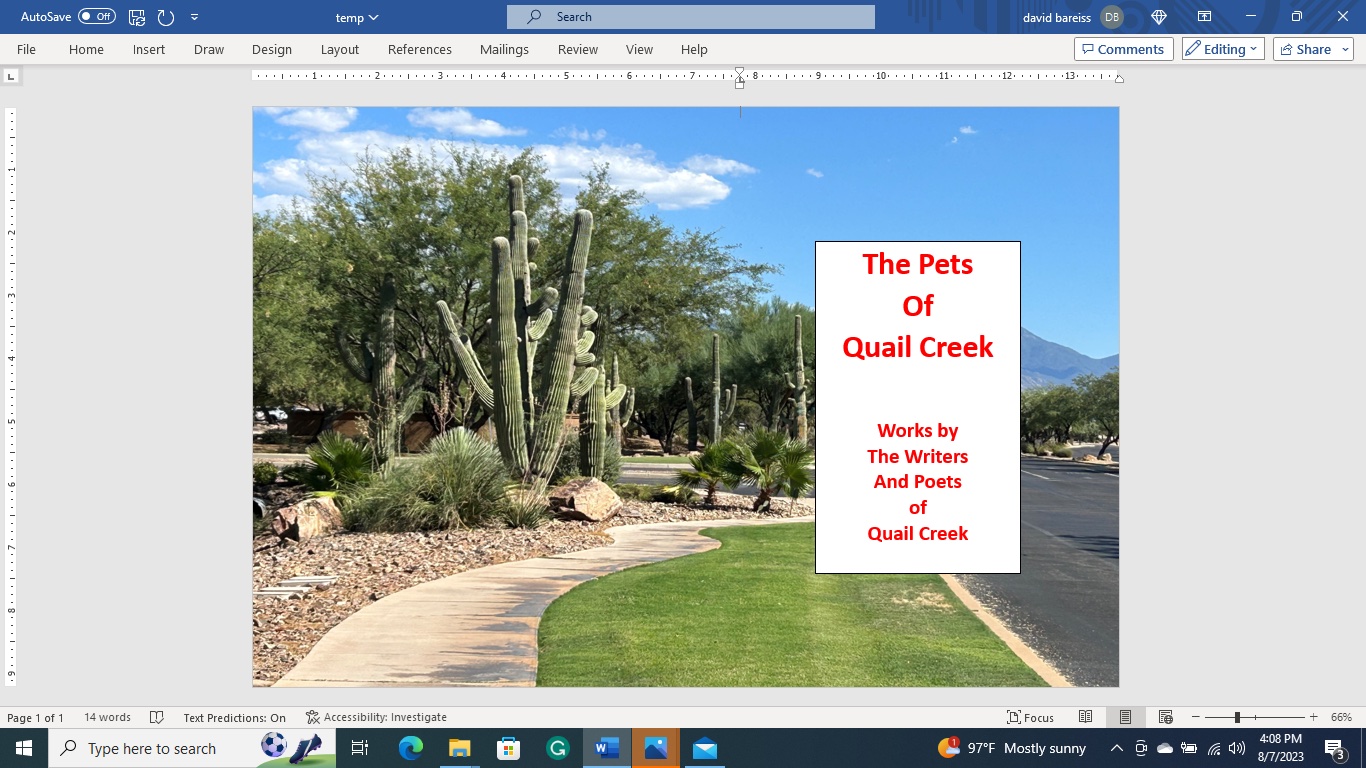
In the display below the text has been changed and moved to the center of the canvas that represents the front cover of the book. The marker handle in the horizontal ruler has been moved to a spot 6.125 inches from the right edge of the canvas to assist in lining up the text box in the center of the front cover.
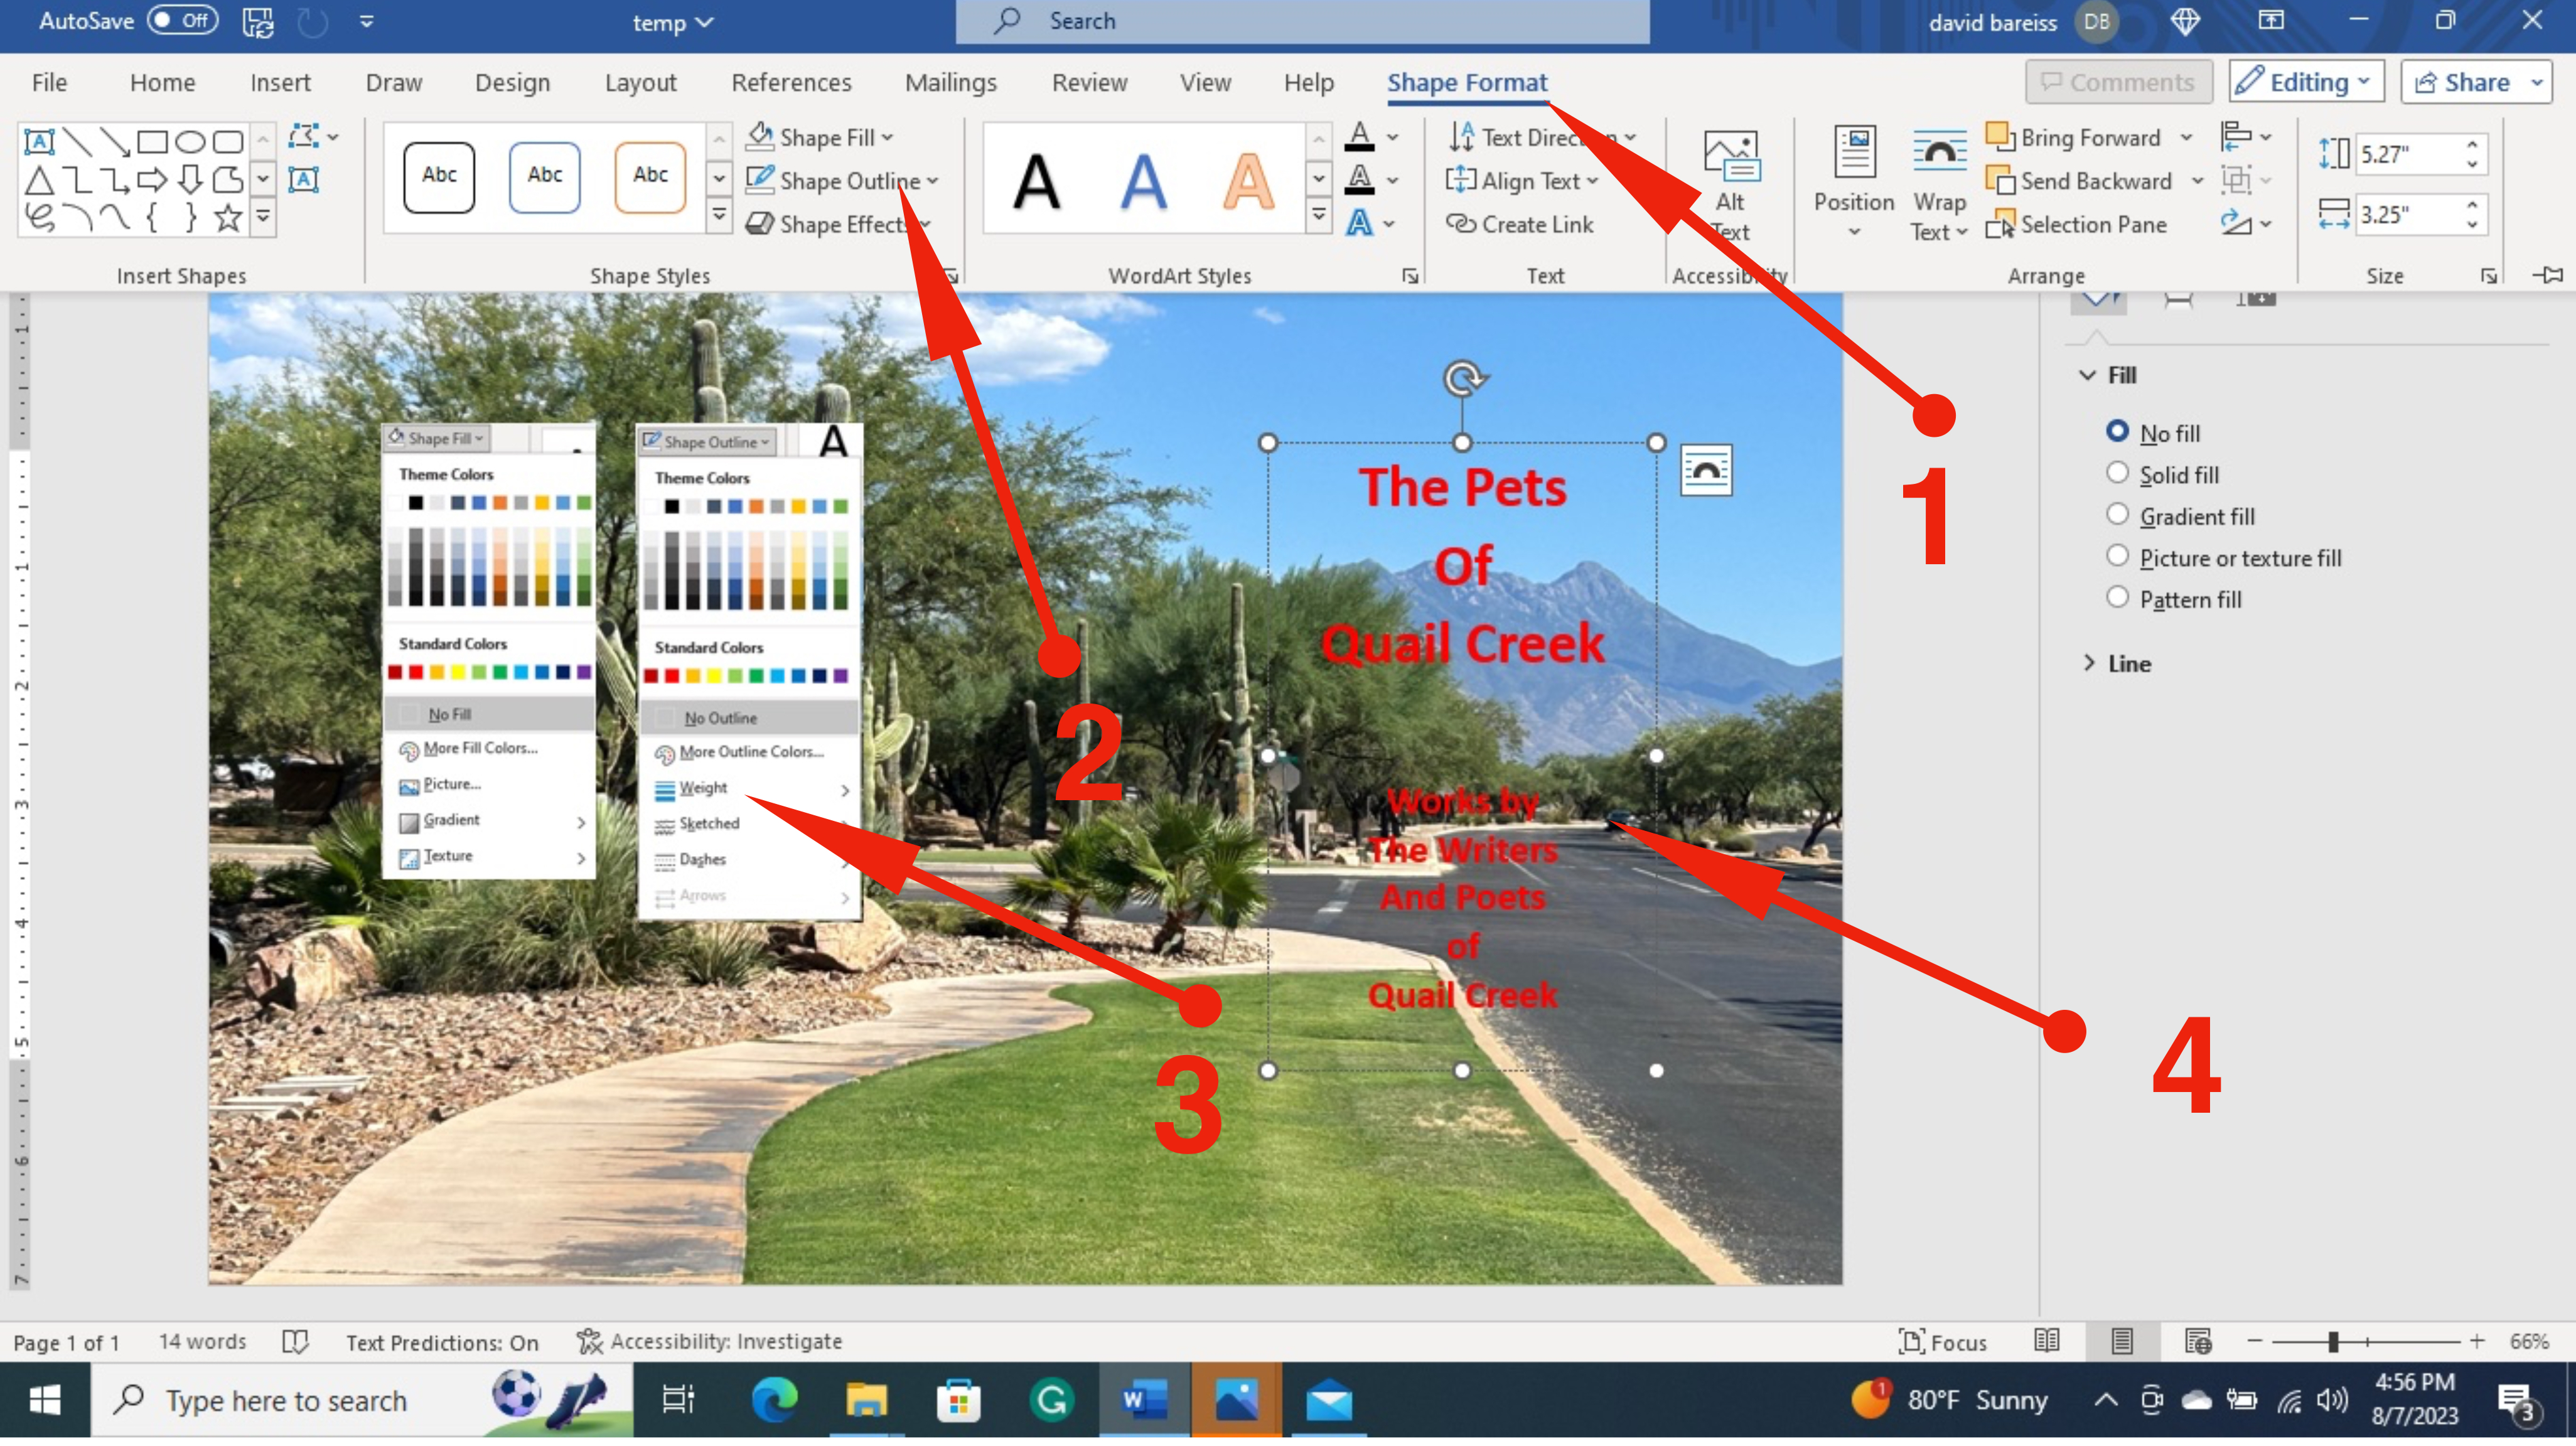
Several changes were made in the following display. Arrow 1 'Shape Format' was selected which caused 'Shape Fill' an 'Shape Outline' selections to appear at Arrow 2. When those boxes were selected, the boxes at Arrow 3 appeared. 'No Fill' and 'No Outline' in those boxes caused the text background to disappear at Arrow 4
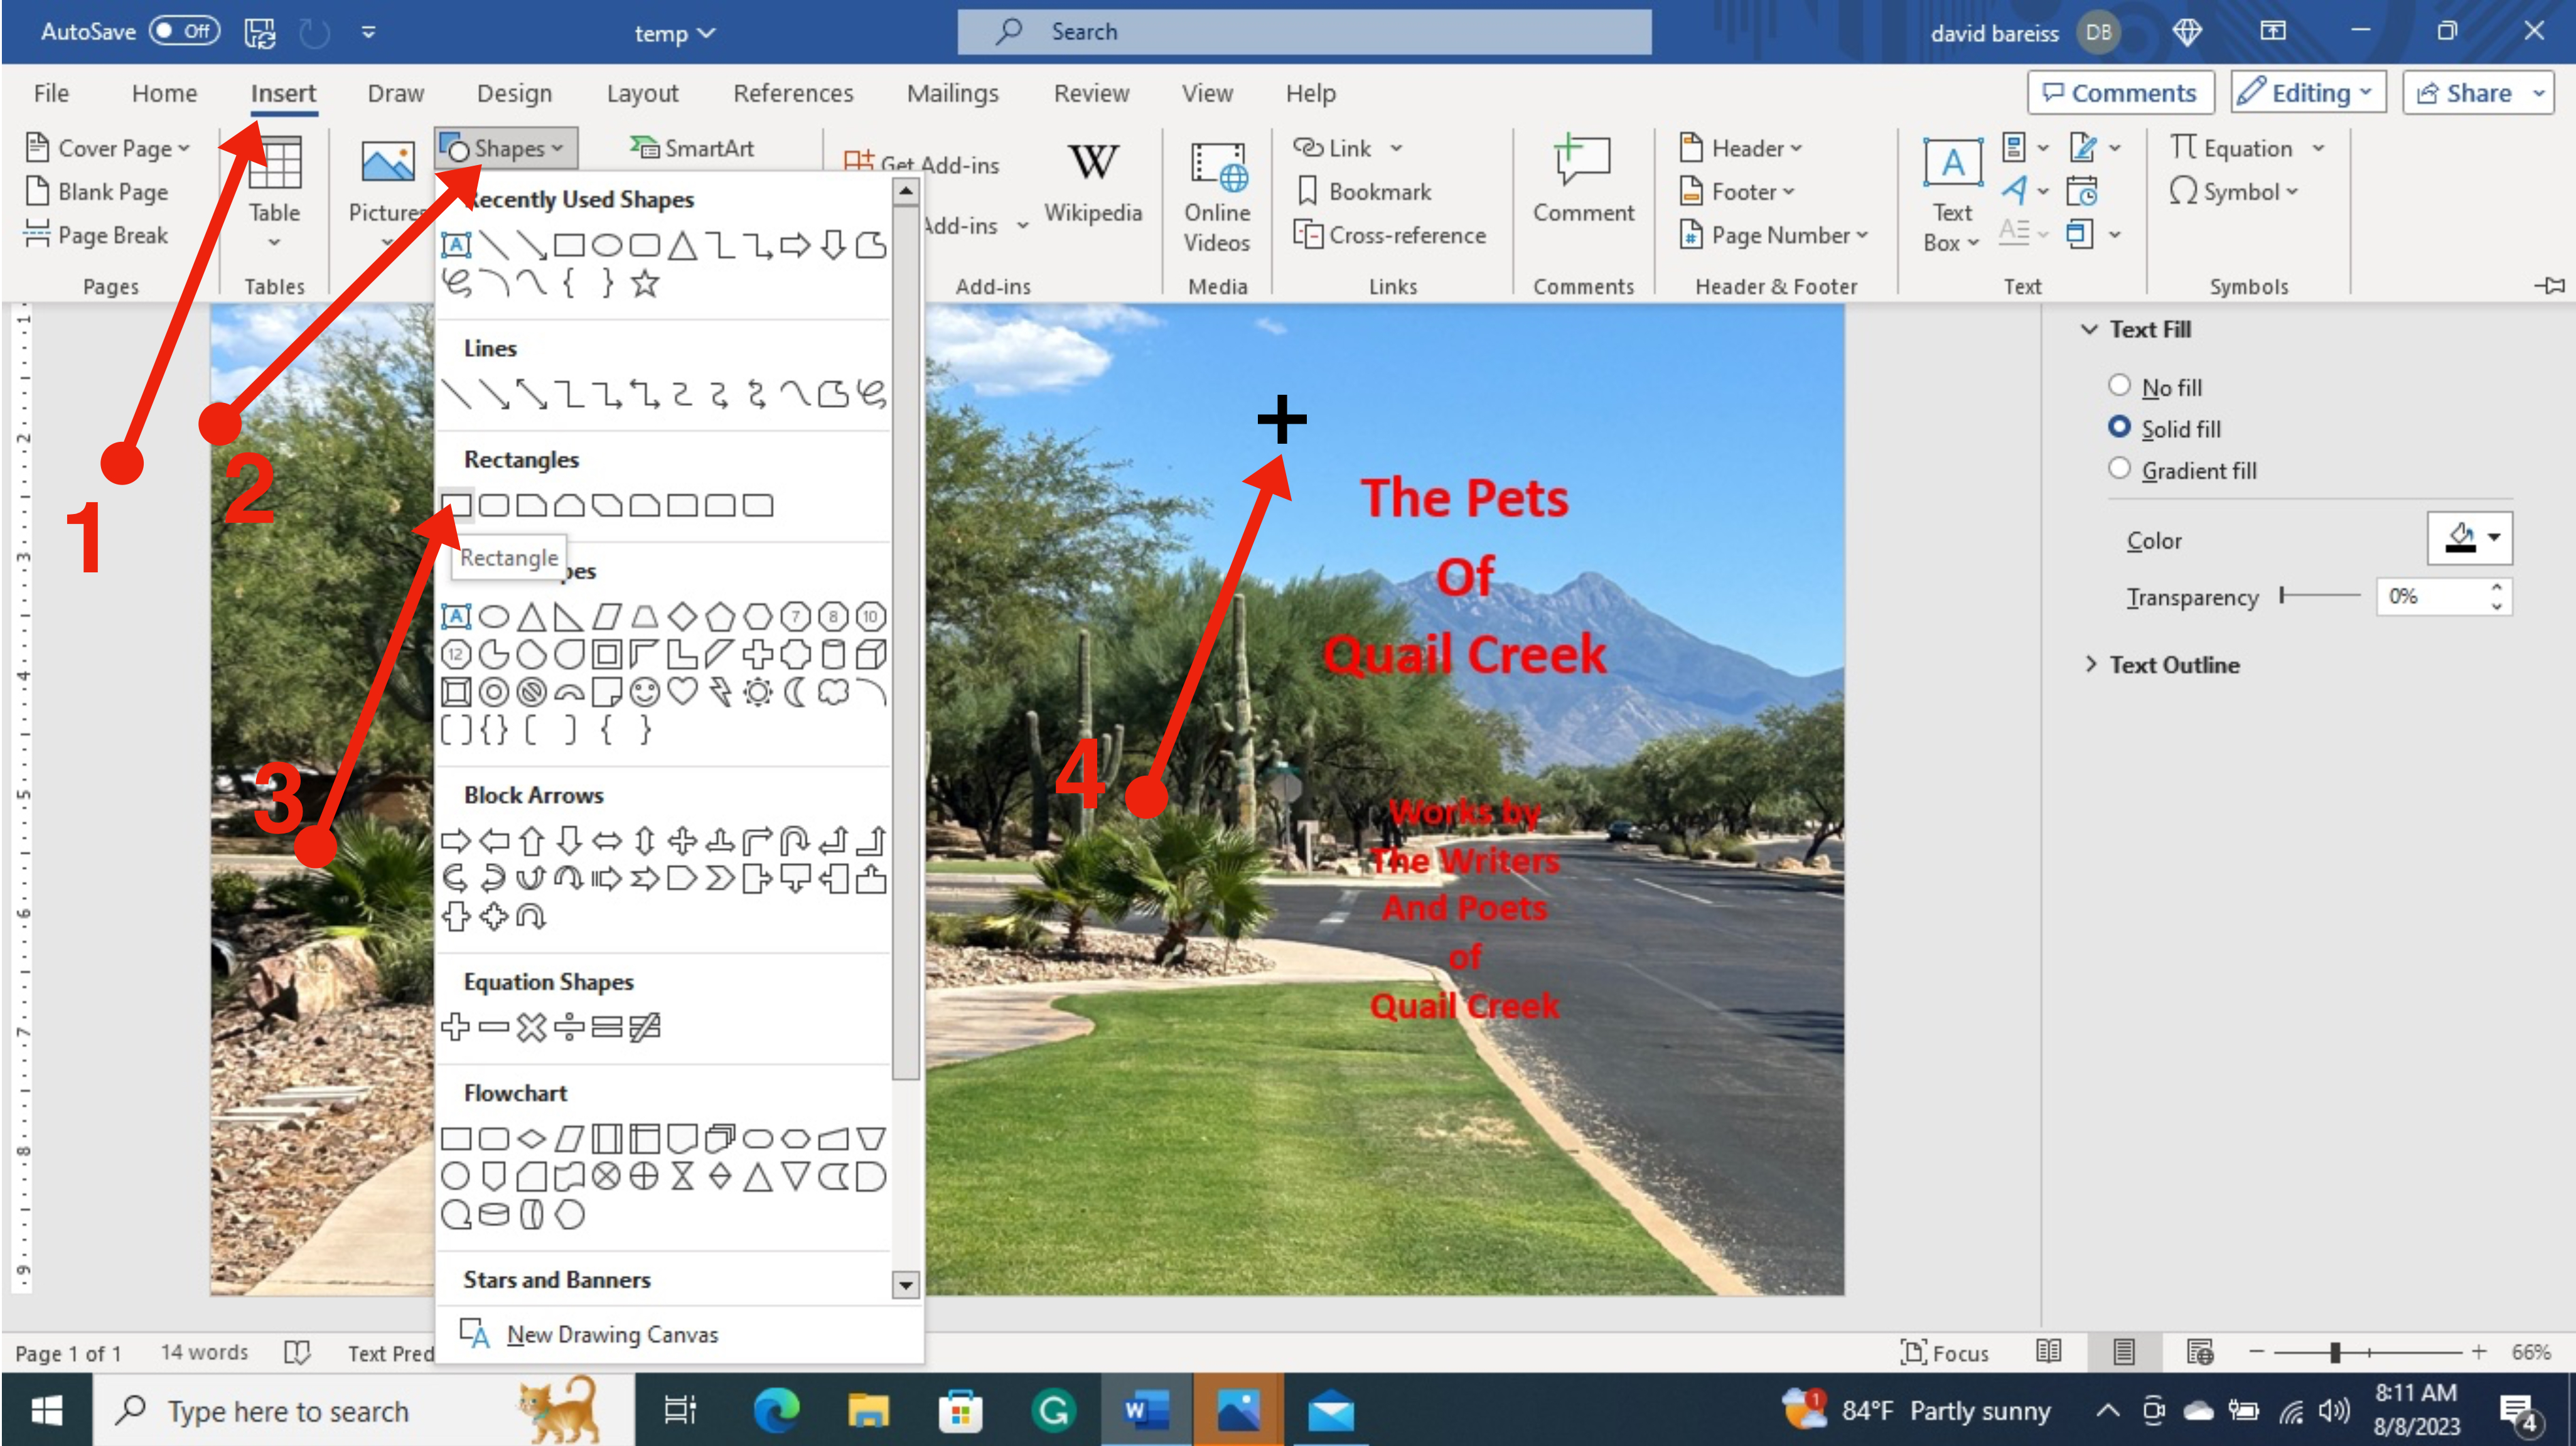
After trying several font colors, none were sufficiently different from the picture background to make the text stand out. To solve that problem a rectangle will be added behind the text. To do that the 'Insert' tab was selected, Arrow 1, followed by the 'Shapes' option, Arrow 2, and the selection of a plain rectangle Arrow 3 As soon as the plain rectangle is selected, the cursor changes to the cross shown at Arrow 4. Position the cursor to the approximate spot shown at Arrow 4.
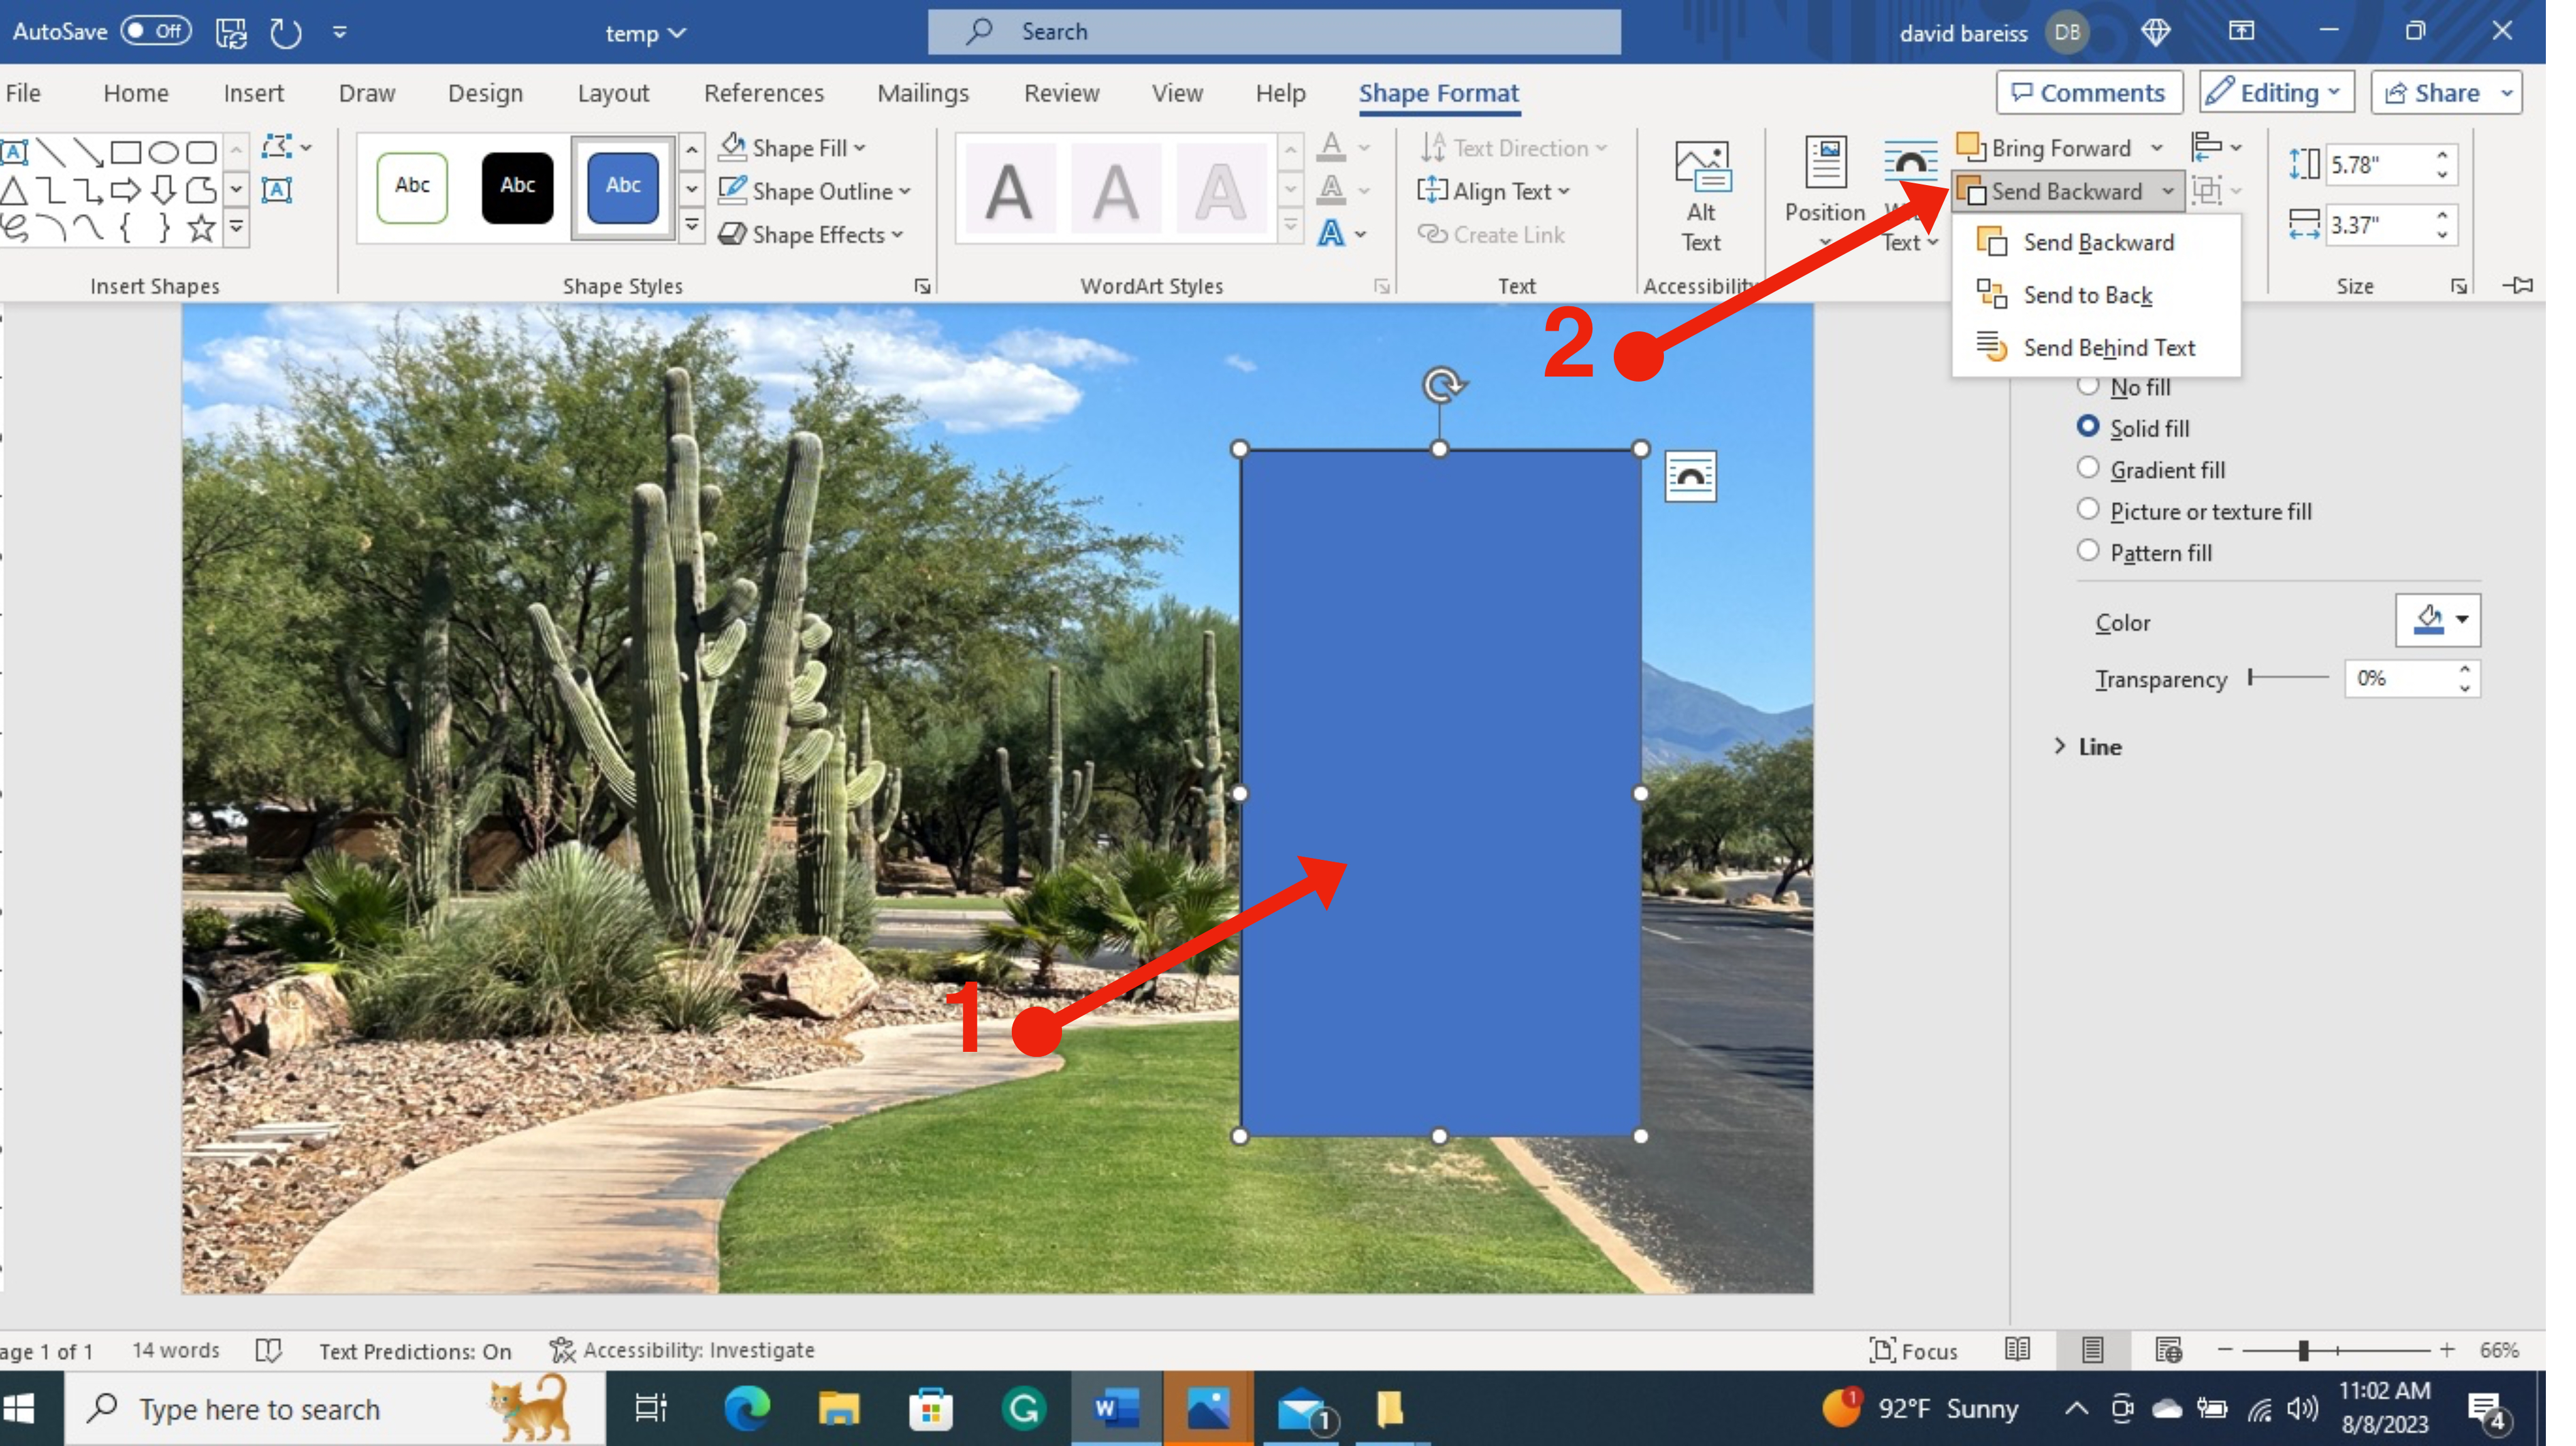
Click on the cursor and drag the lower right corner over the text as shown at Arrow 1 below. Do not be concerned if the box is not correctly positioned and that it covers the text. It will be finely adjusted later, and moved behind the text by selecting 'Send Backward' Arrow 2.
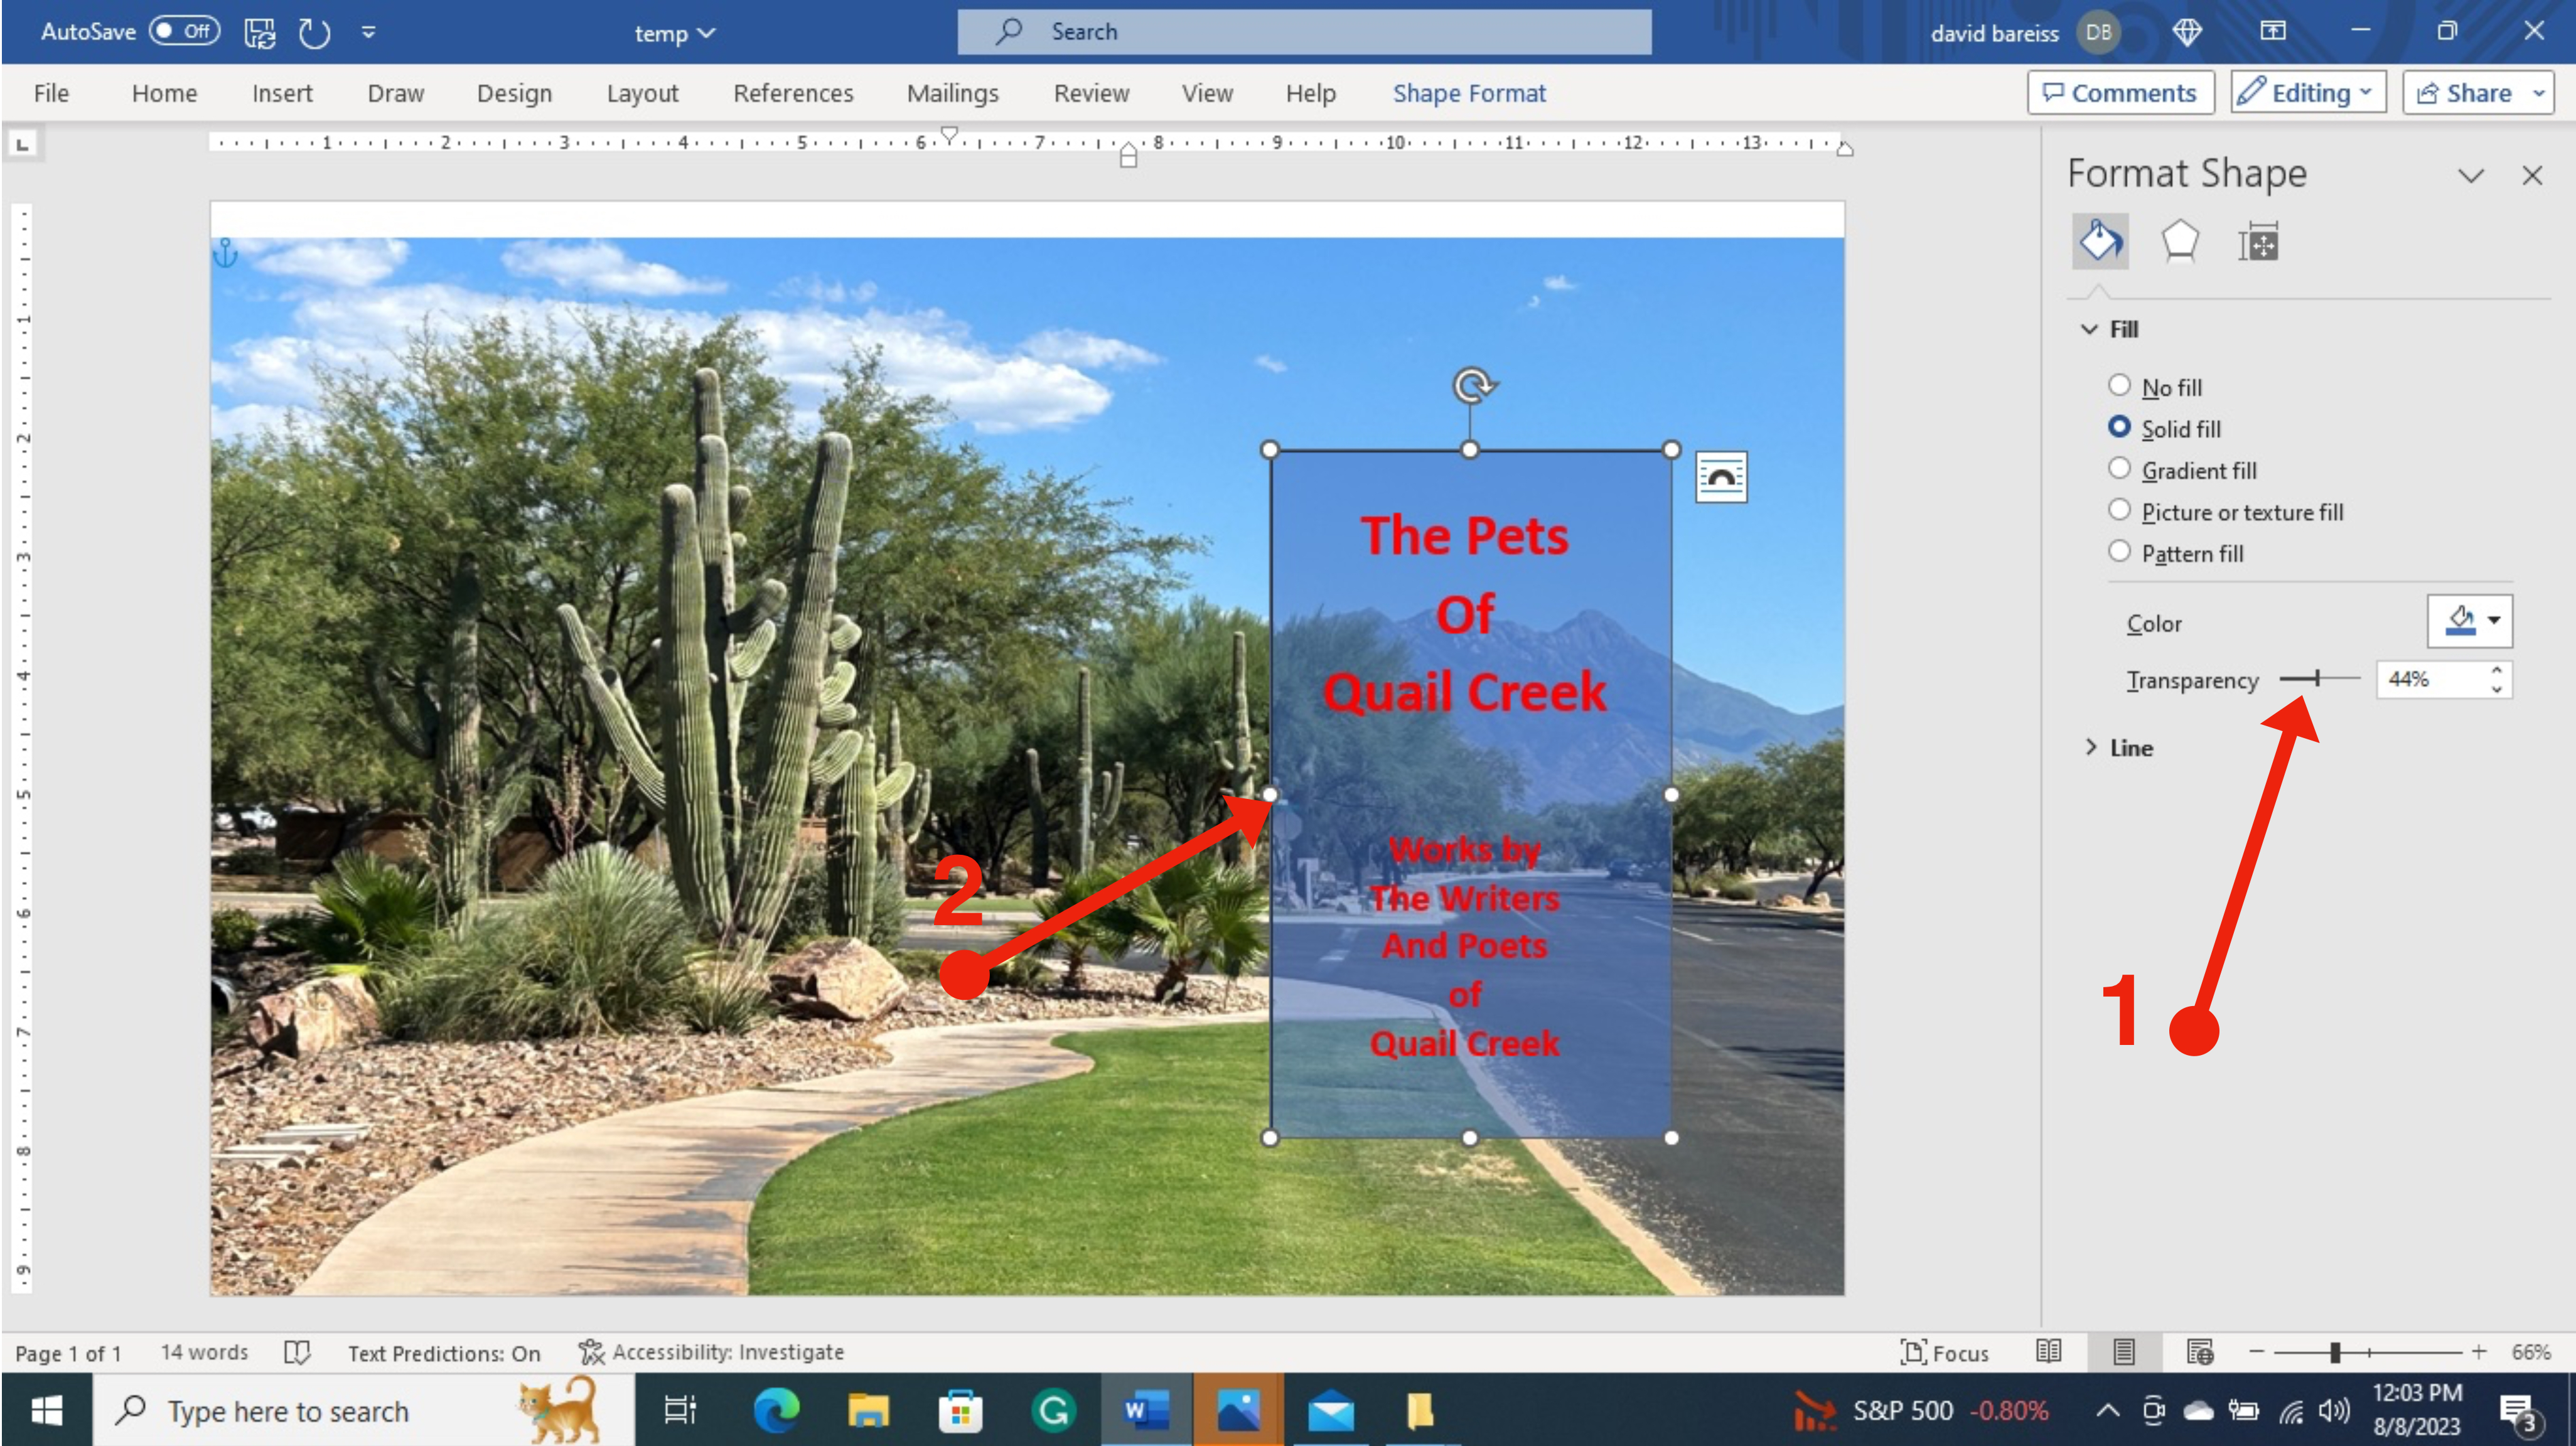
In the display below the rectangle has been moved behind the text and the transparency slider, Arrow 1 has been adjusted to make allow the base picture to show through. The rectangle's position may be adjusted using the selection handles, Arrow 2 on the sides of the rectangle.
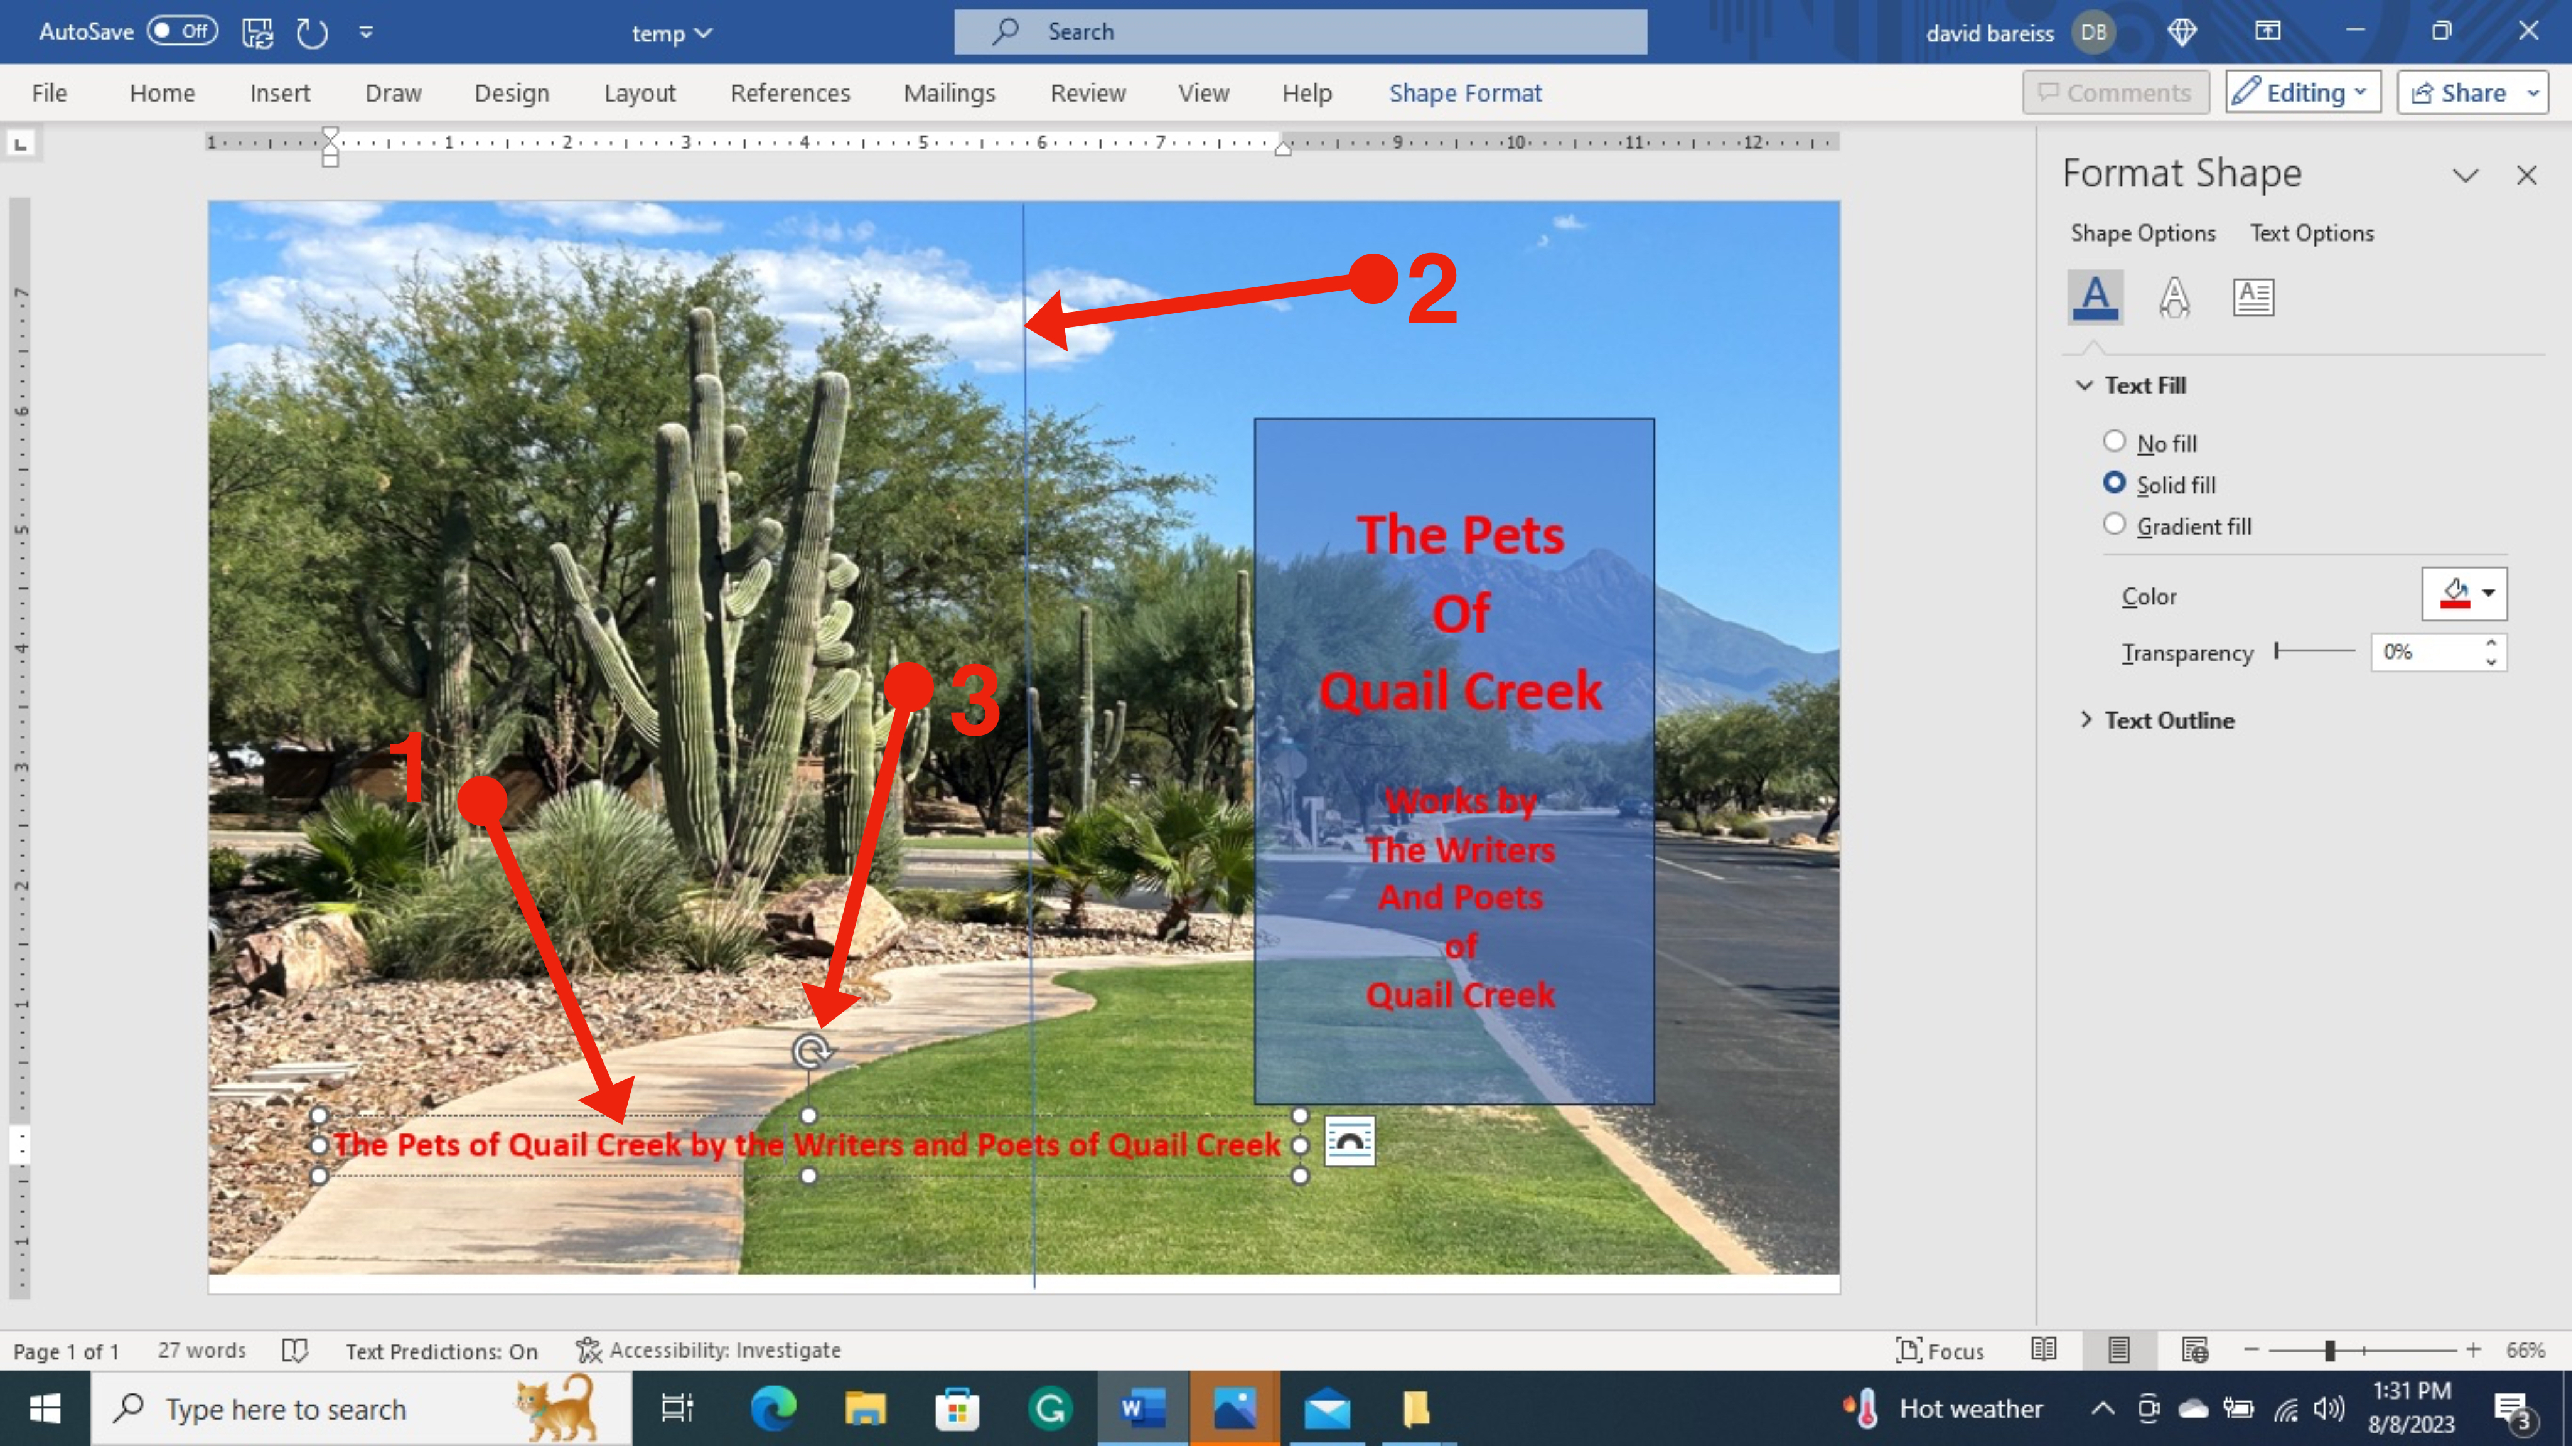
In this display a text box was created for the text on the book's spine, Arrow 1. A line shape was added to help locate the spine text in the center of the canvas, Arrow 2. Using the rotator handle, Arrow 3 and the marker handles on the side to the text box the text was positioned on the spine.
A rectangle was added behind the spine text using the same tools as were used in the text on the front of the cover creating the finished cover below. The same tools can be used to add text to the back cover.
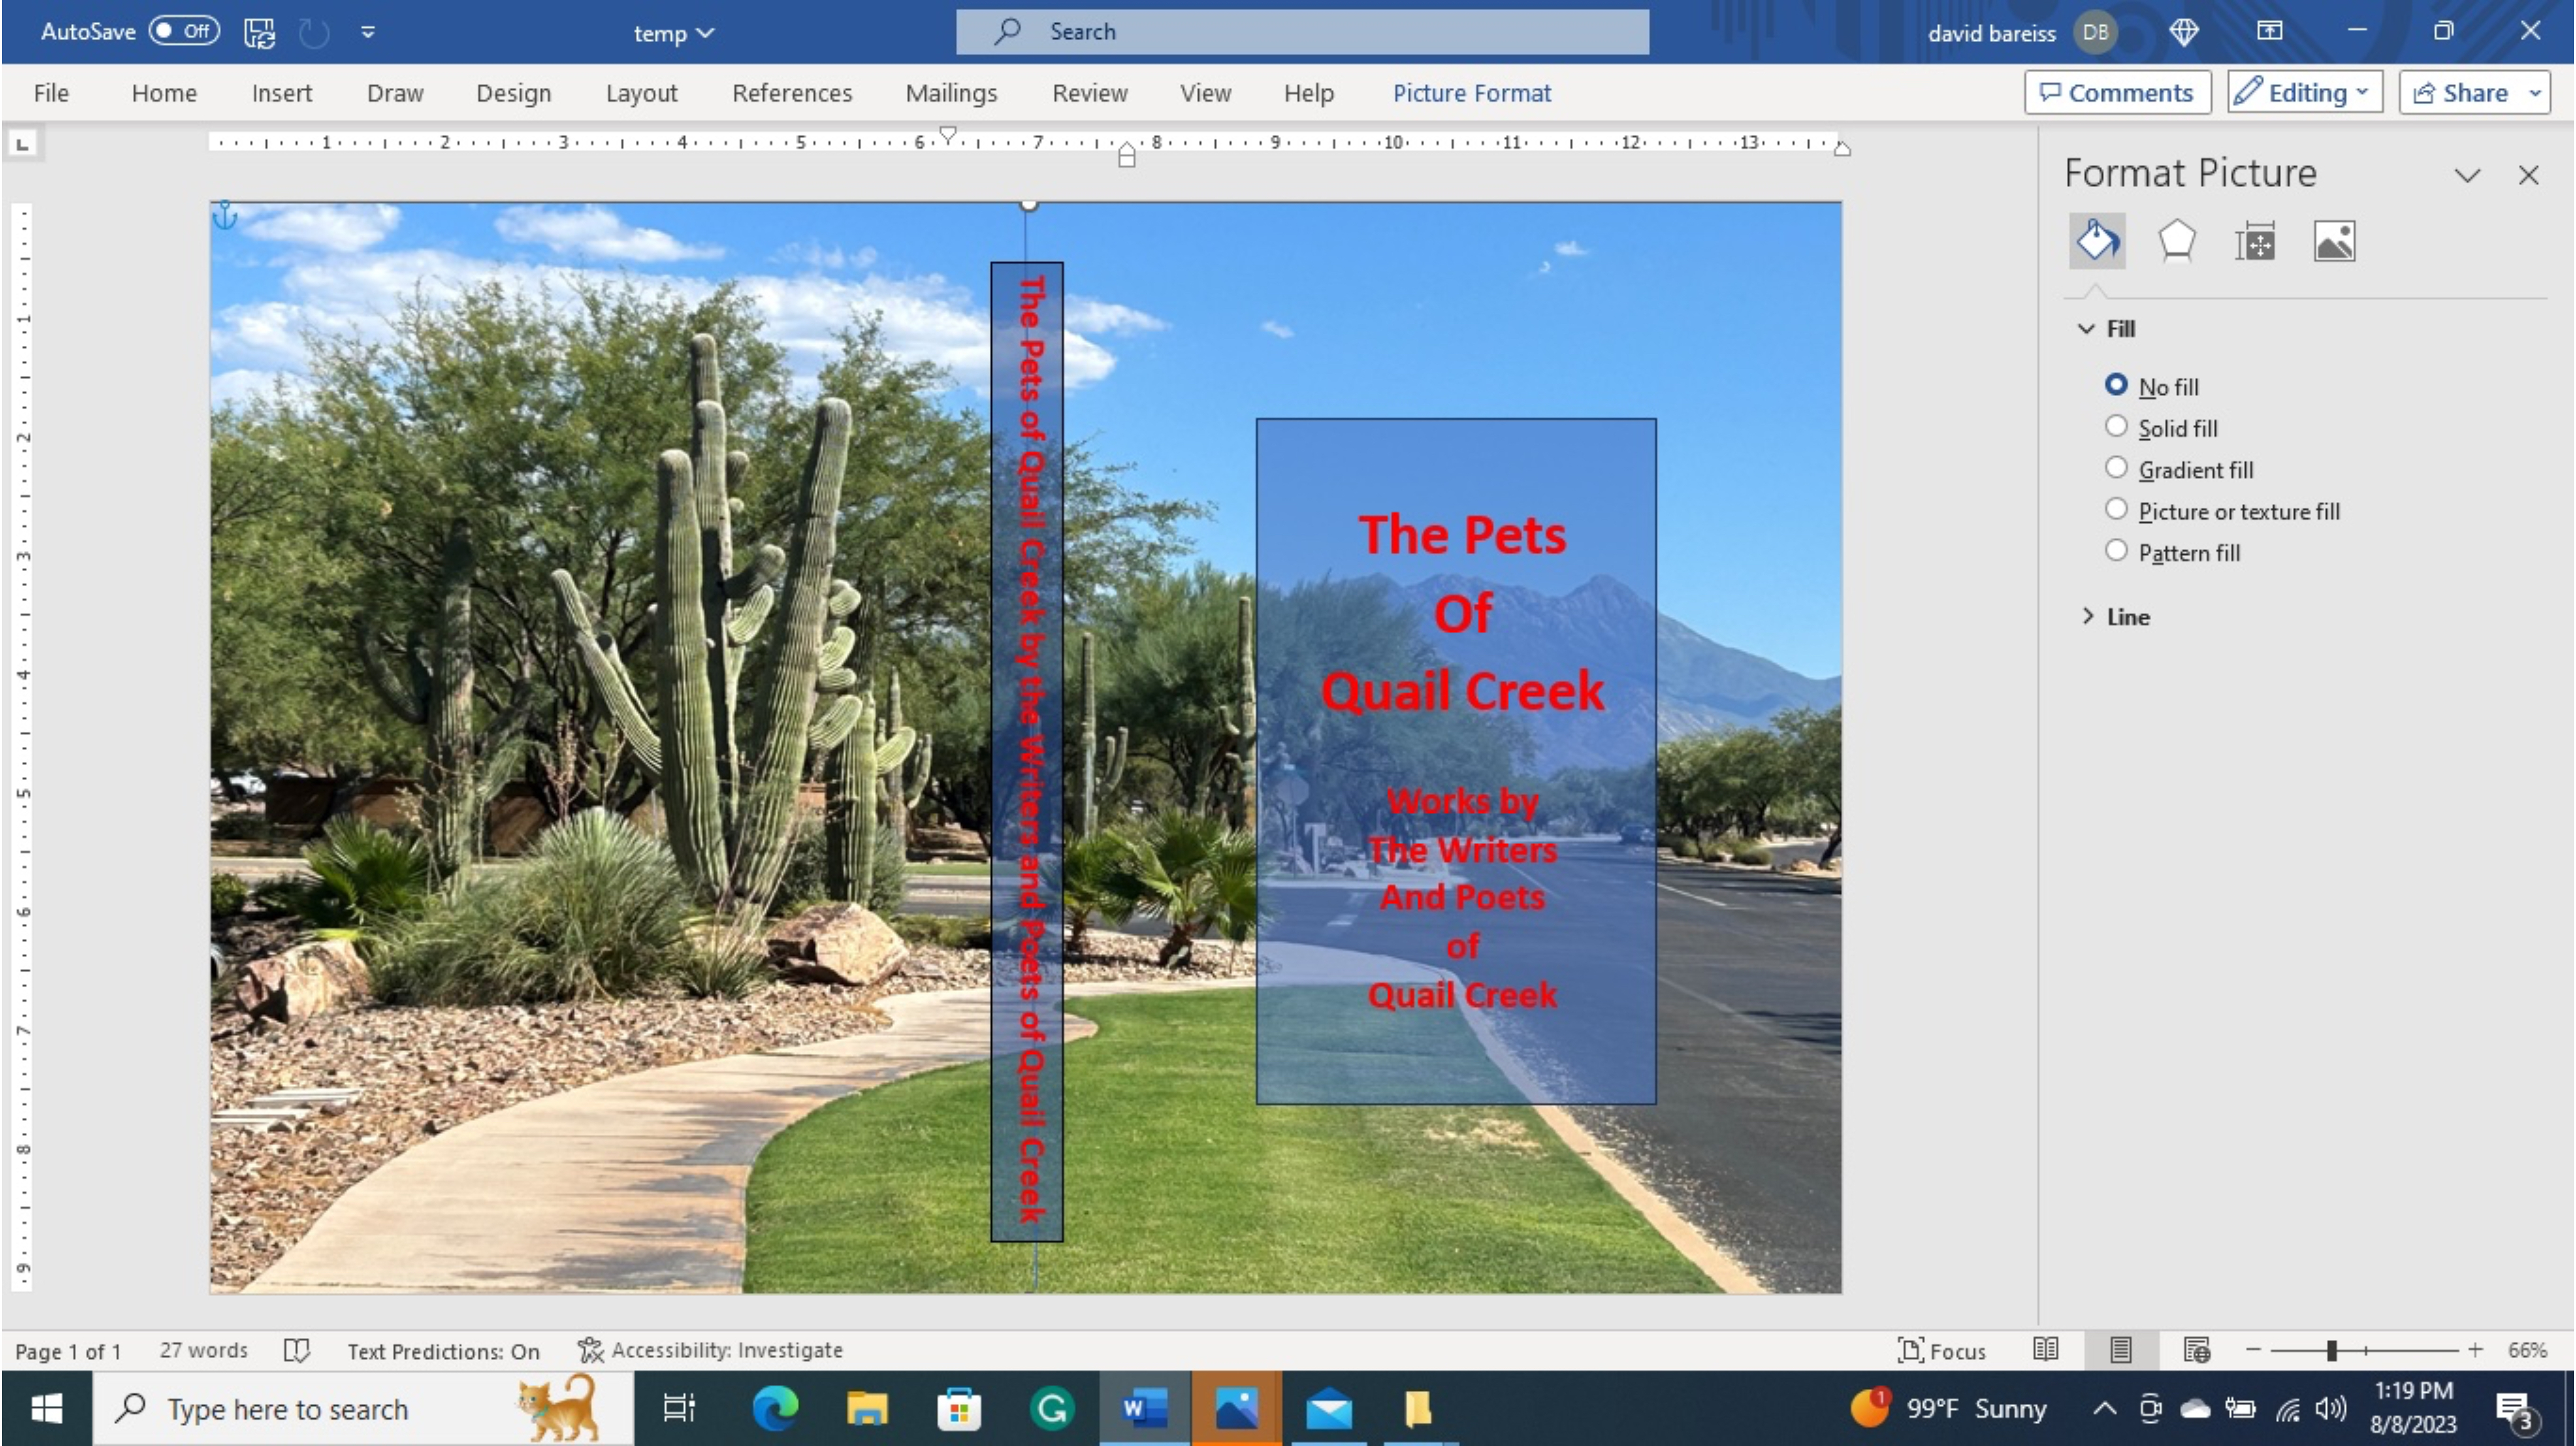
Once your cover is complete, save it as a Word document and then Export it as a PDF document. If you are using Kindle Direct Publishing, upload the PDF document on the Paperback Content/Book Cover page of your Bookshelf. Lauch the Previewer and correct any errors that may occur. Reload as necessary.